


ChatGPTs have become an integral part of our lives and businesses. They are used for customer service, personal assistants, and even for mental health therapy. With recent advancements in natural language processing (NLP), creating ChatGPTs has become easier than ever.
In this article, we will show you how to create your own ChatGPT using OpenAI API and Flask, a popular Python web framework.
Prerequisites:
Before getting started, you will need to have the following:
A free or paid OpenAI API key
Python 3.6 or higher installed on your machine
Flask Python package installed
To use OpenAI API, you will need to have an API key. If you don't have one, sign up for a free or paid account on the OpenAI website.
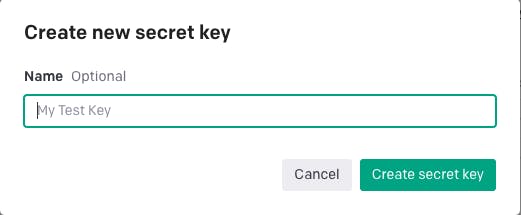
After you create a key then remember to copy it because you won't be able to open it again once you close it and then again you have to make a new key.
Step 1: Setting up OpenAI API
Once you have your API key, store it in a secure location and create a .env file in the root of your project directory. In the .env file, add the following line:
OPENAI_API_KEY=<your_api_key>
Now, you can use the python-dotenv package to load your API key into your Python script. Install the package using pip:
pip3 install python-dotenv
In your Python script, load the API key using the following code:
import openai
from dotenv import load_dotenv

load_dotenv()

openai.api_key = os.getenv("OPENAI_API_KEY")
Step 2: Setting up Flask
Flask is a popular Python web framework used for building web applications. It's lightweight, flexible, and easy to learn.
To install Flask, use pip:
pip3 install flask
In app.py, import the necessary packages:
import Flask, render_template, request
import openai
import os

openai.api_key = os.getenv("OPENAI_API_KEY")
Initialize the Flask app and define a route for the home page. Create a new file called app.py in the root of your project directory and add the following code:
app = Flask(__name__)

@app.route("/")
def home():
    return render_template("home.html")
This code sets up a Flask app with a single endpoint /generate_text. When this endpoint is called with a POST request, it generates a text message based on the provided prompt using OpenAI's GPT-3 language model.
Define a route for generating text:
@app.route("/generate_text", methods=["POST"])
def generate_text():
    prompt = request.form["prompt"]
    response = openai.Completion.create(
        engine="davinci",
        prompt=prompt,
        max_tokens=1024,
        n=1,
        stop=None,
        temperature=0.5,
    )
    generated_text = response.choices[0].text
    return render_template("generated_text.html", prompt=prompt, generated_text=generated_text)
This code uses the openai.Completion.create() method to generate text based on the user's input. The engine parameter specifies which language model to use (in this case, we're using the davinci model). The max_tokens parameter specifies the maximum length of the generated text. The temperature parameter controls the "creativity" of the generated text.
Create a template for displaying the generated text:
<!DOCTYPE html>
<html>
<head>
    <title>Generated Text</title>
</head>
<body>
    <h1>Generated Text</h1>
    <p><strong>Prompt:</strong> {{ prompt }}</p>
    <p><strong>Generated text:</strong></p>
    <p>{{ generated_text }}</p>
</body>
</html>
Final code in app.py :
from flask import Flask, render_template, request
import openai
import os
from dotenv import load_dotenv

load_dotenv() # Load variables from .env file

openai.api_key = os.getenv('OPENAI_API_KEY')

app = Flask(__name__)

@app.route("/")
def home():
    return render_template("home.html")

@app.route("/generate_text", methods=["POST"])
def generate_text():
    prompt = request.form["prompt"]
    response = openai.Completion.create(
        engine="davinci",
        prompt=prompt,
        max_tokens=1024,
        n=1,
        stop=None,
        temperature=0.5,
    )
    generated_text = response.choices[0].text
    return render_template("generated_text.html", prompt=prompt, generated_text=generated_text)

if __name__ == '__main__':
    app.debug = True
    app.run()
Step 3: Prepare the frontend
Create a directory named templates. Inside templates, create two files -
home.html
generated_text.html
In home.html, create a basic HTML form that allows the user to enter some text:
<!DOCTYPE html>
<html>
<head>
    <title>OpenAI Demo</title>
</head>
<body>
    <h1>OpenAI Demo</h1>
    <form action="{{ url_for('generate_text') }}" method="POST">
        <label for="prompt">Enter a prompt:</label>
        <input type="text" name="prompt" id="prompt">
        <button type="submit">Generate text</button>
    </form>
</body>
</html>
Create a template for displaying the generated text inside generated_text.html:
<!DOCTYPE html>
<html>
<head>
    <title>Generated Text</title>
</head>
<body>
    <h1>Generated Text</h1>
    <p><strong>Prompt:</strong> {{ prompt }}</p>
    <p><strong>Generated text:</strong></p>
    <p>{{ generated_text }}</p>
</body>
</html>
Step 4: Testing
Run the app using flask run and go to localhost:5000 in your web browser. You should see the home page with a form where you can enter a prompt. Enter a prompt and click "Generate text" to see the generated text.
You can press Ctrl + C to stop the server.
While this is a basic example, the app can be customized to fit your unique requirements. For instance, you can incorporate JavaScript to dynamically update the page without refreshing it whenever the user submits the form, or you can choose to utilize a web framework other than Flask.